In this article we provide Tips on How to Administer
- Oral
- Eye
- Ear
- Subcutaneous Medications to your pet, no matter what stage of life they may be in.
Routine Medical Care Challenges
Providing basic medical care to your pet can be challenging. Your dog often times can behave better for a stranger, such as a veterinarian or a groomer, than for you when these types of procedures are being provided.
The reason behind this is that your dog does not know what to expect from a stranger and is more likely to behave during a procedure. Whereas the dog may fuss more or struggle with the you, during a medical activity, such as giving a pill. This is because of the relationship of give and take that exists with pet and person.
The more dominant or bossy your dog is with you when it comes to everyday things such as pulling on the leash, listening to commands etc , the more likely he will be resistant with accepting the physical manipulation associated with many medical procedures.
For this reason, it is important to practice the methods that will be discussed often and well before you actually need them so you are familiar and confident on how to use them.
Let’s begin with some basic Medical Procedures that can be useful to know.
How to Give your Dog Oral Medications
Tablet and Capsules : Method & Tips
During their lifetimes, dogs need to take oral medications for ailments such as allergy relief pills, antibiotics, pills for pain, heart ailment, GI issues…. just to name a few.
Most people would be happy to tell you that all you need to do in order to give your dog a pill is to wrap it up in a piece of food such as cheese or an attractive tasting soft treat and it will be gobbled up quickly. That is true for many dogs.
However, dogs who have to take lots of pills on a regular basis catch onto this trick and will impressively spit out the pill and eat the food. This can be frustrating.
How To Administer Pill Without Food
Therefore, it is helpful to know how to administer a pill with no food. Also, there could be times in your dog’s life where hiding medication in a treat is not possible.
For example, the prescription may require that the medication be taken on an empty stomach or your dog’s illness may make him lose his appetite. He will resist the food whether or not it contains a pill.
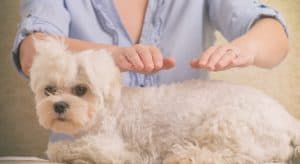
How To Give A Pill To Your Dog
The Steps To Administer A Pill To Your Dog
- Begin by placing a slip lead or a leash around your dog’s neck. The leash is a symbol of authority. This will communicate both mentally and physically that you are establishing control and expect good behavior.
- Next place the dog in a sit position.
- Either kneel behind your dog or stand closely by his side or place him sitting on a table . This will all depend on his size and your physical agility.
- With one hand (your less dominant hand), open the dog’s mouth by holding his muzzle on top.
- With the other hand, drop or place the pill in is mouth as far back as possible and in the middle.
- Keeping it centered will help eliminate the chances the dog will push the pill between his teeth and gums. That would be his instinct to do so. Be sure the pill lands over the hump of the tongue. It should be as far back on the tongue as possible. It helps if you are tilting his head up. This will help the pill fall back down to his throat. Think of it as making sure his nose is pointed towards the ceiling.
- Once the pill has been dropped or placed in the center of the throat, close the dog’s mouth with one hand and continue to keep his head slightly tilted upward.
- Stroke the dog’s throat with your free hand. This will cause an involuntary swallow reflex.
- Once you see the dog swallow and lick his lips, this means he has likely swallowed the pill.
- Continue to rub his neck for a few more moments to help ensure that you were successful.
If the pill did not properly reach the back center area of the throat, the dog may have thwarted your attempt to ‘pill him’. You will know this because the dogs will spat out the pill and most likely look at you with disdain!!
In this case you would have to try again. Remember to speak to your dog firmly but gently as you attempt this procedure. You do not want to scare him but you do not want him to think you are a pushover either.
After he swallows the pill, don’t forget to praise him on a job well done.
Keep Practicing
You should practice this medical procedure of pilling your dog frequently and well before you actually have to administer medication. Even though your dog may take a pill easily with food, there may be a time in his life where you cannot use food with the medication or he will not accept food due to his illness. You should be practicing
Now for that future event prepare yourself and your pet dog for taking medication in this manner as it will make it more likely that you will be successful when you need to do this.
A recommendation would be for every 4 times you ‘pill’ your dog using food; on the 5th time use this method we have presented above.
Have Oral Medication Compounded
Another solution to providing your dog his oral medication is to have it compounded at a pharmacy. This means turning the medication into liquid form by mixing it with other benign agents. It is then mixed with a flavor pleasing to a dog such as “chicken flavor’ !!
There are animal pharmacies who can compound. Also, many human pharmacies will compound for pets as long as it is a medication also used for humans.
Most veterinarians will have access to a facility that will compound.
Liquid Medication: Method & Tips
You can request from your veterinarian that your dog’s tablet or capsule medication be in liquid form if he will not take a pill. Also, very small dogs may require a dosage too small for pill size and it therefore must be compounded into a liquid.
Liquid medication is also helpful for very ill, aged or lethargic dogs as a more humane and effective administration method. Finally, there are some pets medications only available in liquid form. All of these reasons make knowing how to administer liquid medication important.

Steps To Administer Liquid Medication
- Place a slip lead or a leash around your dog’s neck. This is will remind the dog that you are in charge. It will show your dog that you are physically and mentally in control during this interaction and expect the dog to behave.
- Next, put the dog in a sit position.
- You should position yourself either behind or beside the dog. You may kneel or stand next to the dog or even place him on a table. This all depends on your dog’s size and your physical agility.
- With the fluid in the syringe, tilt the dog’s nose upward towards the ceiling.
- Slide the syringe through the corner of the dog’s lips and into the space between the cheek and the molar teeth.
- Inject slowly by pressing the plunger end of the syringe and holding the dog’s head still. The dog will involuntarily swallow. If you try to force the medication in too quickly, it may flood the dog’s throat and make it an unpleasant experience.
- Remember to be firm yet gentle verbally and physically when administering the medication. We do not want to frighten the dog. However, we do not want the dog to feel as though he can struggle his way out of the situation.
Praise & Practice
Don’t forget to praise the dog upon completion. You can and should practice this by purchasing a syringe at the pharmacy and putting something tasty in it such a chicken broth.
Once or twice a month, practice the method outlined here. This will help you become more confident and familiar with how to give liquid medication. It will also help the dog to view this as a normal part of life. Someday you will need to give your dog a liquid medication. It makes sense for both you and your dog to be prepared.
Some dogs will happily lick the medication from the syringe without this technique due to its delicious taste. All you have to do is present it to their lips and they will sniff then start licking the medicine as you slowly dispense it from the syringe by pressing the plunger.
Another tip is to plunge the syringe- full of medication slowly onto a square of bread. The bread will safely soak up the medication and the dog may then eat the bread. This can only be done of course if the dog is allowed food with the medication and is not too sickly to have an appetite.
Loading Liquid Medication into the Syringe: Method & Tips
Now, some advice on drawing the fluid in the syringe. The most important tip here is understanding the dosage requirements vs the dosage markings on the syringe before you load it with the medication.
The wider the circumference of the syringe or the barrel of the syringe, the larger the dose. . For example you could have a 3 ml syringe or a 1 ml syringe.
- A 1 ml syringe has literally 100 marking measures on it and is numbered by 1/10th ml at a mark.
- A 3 ml syringe has 30 marking measures and is numbered by 1/2 ml at a mark.
So, for example, if your prescription is 1 ml a day, and the veterinarian gave you a 1 ml syringe. It would be full to the max once you loaded the syringe. If the veterinarian gives you a 3 ml syringe, it would only be 1/3 full with that same dosage. That could be very confusing to a pet owner who is suddenly faced with having to administer liquid medication and has had no practice at it.
It is recommended that you have the veterinarian mark the actual syringe with a sharpie at the point where the medicine should be filled to. That way it is now fool proof.
Another tip related loading the liquid medication in the syringe has to do with the medication bottle. Be certain before you leave the vets office that the tip of the bottle snuggly fits the tip of the syringe you have been given. Sometimes you can be given a bottle tip with a circumference different than the syringe tip. That can be messy and aggravating and ultimately lead to ineffective drawing of the medication. Just dipping the syringe in an open bottle is dangerous due to settling of the solution.
In many cases, it must be shaken well and drawn immediately. Remember to ask the vet to be sure to give you a syringe that fits the bottle tip. And actually test it out before you leave the vet office. It is important to be on top of your game when providing medical care to your pet. So do not by shy speaking up at the vet’s office.
How to Draw Liquid Medication: Method & Tips
With all of these cautionary tips in mind, here is a description of how to draw liquid medication. Follow the directions on the bottle, which will undoubtedly include ‘shaking well’ and the dosage amount. The syringe has two parts. A plunger to draw the medication and a tube, known as a barrel, to hold the medication.
- Place the syringe tip on the medication bottle tip.
- Rest the bottle in your less dominant hand and the syringe (which is now connected to the bottle) in your other hand.
- Raise the bottle up and at a slight tilt, so it is above the syringe.
- Pull the plunger handle towards your body, so the tube begins to fill with fluid.
- Most people find that the easiest way to draw the fluid from the bottle into the syringe is to apply the pull pressure with your thumb. The tip or bevel of the plunger has two black lines.
- The top line should rest in equal position to the desired amount of fluid. So if you are drawing 1ml, for example, the top line on the bevel should meet the written ‘1ml’ mark on the syringe tube. (aka it should meet the sharpie mark the vet put on your syringe).
You can practice this method of how to draw liquid medication into a syringe as often as your would like without having to bother your dog !
It is important that all dog owners become familiar with this and all other types of medical procedures they may someday have to perform for their dogs. The more familiar you are the more confident your will be when performing them. Hence the more success you will be in properly treating your dog.
Eye Medication: Method & Tips
There are lots of reasons why in your dog’s lifetime he may require eye medication. They could be for something as simple as allergies or conjunctivitis. They could be for something more serious as Glaucoma.
There are two forms of eye medication;
- Drops and
- Ointment.
Tips
- Never allow the medication applicator to touch the eye.
This is easier said than done when trying to give your dog eye medication! Nevertheless it is an important practice to follow. If the tip of the applicator touches the eye, you can risk scratching the surface of the dog’s eye. This could cause an ulcer on the eye which can be very painful and compound whatever medical issue is going on.Also, you risk transferring bacteria from the applicator tip to the eye if they should touch. This could cause conjunctivitis or some type of infection. - Helpful to have a second person to help hold your dog.
Often when giving your dog eye medication, you’ll wish you had 3 hands! Dogs often do not want to cooperate with this medical procedure.They may struggle, not keep still and even head shake allowing the eye drops to land every where but in their eyes! It can be helpful to have a second person around to help hold your dog. With that said, the instructions given will be as if one person is giving the medication.

Administering Eye Drops & Eye Ointment: Method & Tips
- Put your dog on a slip lead or a leash. This will help you better assert your authority, as a leash represents control. The dog will be more likely to behave for what lies ahead.
- Next, put your dog in a sitting position.
- Depending on your dog, you may want to be in front of him or behind him when you give the eye medication.
- We highly recommend placing yourself behind the dog, putting him in a sit position. He will be less likely to squirm away from you. If you are in front of the dog when giving the eye drops, the dog can easily back away and he could even nip at your face, as you would be in very close frontal contact. Unless of course you have a helper. In which case they can be behind the dog, cradling them in the sit position.
- Next, with the medication in your dominant hand, rest the side of this hand on the bone above the upper eyelid, this is known as the Stop. This hold of the Stop will help prevent poking the medication tube into the dogs eye if you are jostled.
- With your less dominant hand, tilt the dog’s head backward slightly , by using a few fingers under the chin supporting the dogs head.
- With this same hand, pull down the lower eyelid with your thumb. This is the basic hold.
- Remember, if a helper is available, they can cradle the dog in a sit position from behind and hold the head in the above describe way so you can distribute the medication using two hands.
- Once in this position, you should apply the Drops or Ointment slightly differently.

Some useful tips now follow.
For Drops:
- Place drops directly in the center of the dog’s eye. Be careful not to touch the tip of the dispenser to the eye.
- Also, do not free the dog immediately. Give those drops a chance to settle. This is due to the fact that as soon as you release your dog, he will invariable start shaking his head to combat the effect of the eye drops. If you release him immediately, you could end up having eye meds all over your face!!
- Another tip is that most eye drops are stored at room temperature. If this is the case with your pets medication, we recommend being mindful of the fact that cold eye drops are more unpleasant that warm drops. Therefore keep the drops away from drafty or air conditioned rooms. Perhaps keep them in your sock drawer, warm and protected from ‘extreme room temperatures’.
- Roll the med bottle back and forth in your hands to warm it up a bit. And with that said Of course Never heat up eye drops.
For Ointment
- You need to be sure that the ointment reaches under the lower eyelid. This will help the ointment distribute more evenly over the eye as otherwise, the ointment could be squeezed out from the dog blinking.
- Remember to gently pull the on the skin just below the lower eyelid. Squeeze the ointment into the pocket between the lid and the eye.
- Then release the eyelid, trapping the medication. The directions on the ointment will tell you to apply the ointment in a strip or a line vs a blob. Follow the directions on the tube as to the amount. It will say ‘ 1/4 inch ribbon strip for example’
- Remember to be firm but gentle both verbally and physically when applying eye drops or ointment. This is perhaps the most difficult medication to deliver to your dog. You do not want to frighten the dog but he does need to relinquish control over to you in order for you to be successful in this endeavor.
- Remember to praise your dog and give him a treat when you are done.
- Practice administering eye medication to your dog easily and safely by purchasing ‘artificial tears’. Place a drop or two in your dog’s eyes once a week using the method presented. This will help you gain confidence and make this novel activity become normalized for the dog. Better to be prepared now for that potential future event.
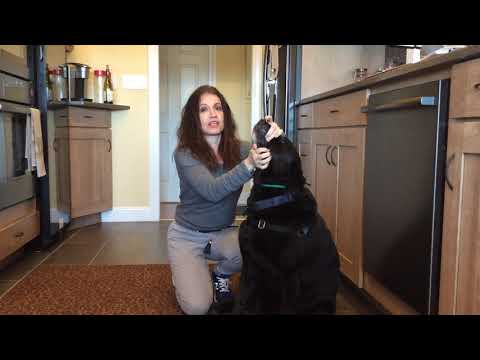
How to Administer Ear Medication:
Method & Tips
There can be many medical reasons why your dog may need ear medication in his lifetime. Ear mites, allergies, yeast and bacterial infections are some examples.
There are two forms of ear medication; ointment and drops. Administering ear medication is one the easier medical procedures to perform on a dog.
The Steps to Administer Medication
- Begin by placing a slip lead or leash on the dog. This asserts your control and should keep your dog better behaved.
- Next place the dog in a sitting position.
- Stand or kneel by your dog’s side closest to the ear being treated.
- You may also place the dog on a table to perform this procedure. This all depends on your dog’s size and your physical limitations, if any.
- If the dog has floppy ears, lift the ear open with the inside of the ear exposed.
- Use your less dominant hand to hold the ear open and the other hand to place the drops or ointment in the middle of the ear opening.
- Rub the base of the ear in order to allow the medication to move the deeper into the ear.
- Take your time and release the dog only after you have you feel the ointment or drops have settled.

Tips on the Administering the Medication
- After administering the medication it is best to wait a little before releasing your pet as a dog’s most common response to being given ear medication is to ‘Shake their Heads’ spraying ear drops all over the room!!
- A few other tips are to refrain from allowing the tip of the medication dispenser, whether it be ointment or drops, from touching the ear. This will avoid ear injury as well as the chance of exchanging bacteria from the dropper to the ear.
- And of course, be firm yet gentle verbally and physically when administering ear medication. This will reduce fear while at the same time reduce protests from your dog.
- Give a treat and praise after your finish.
- A good way to practice would be to purchase ear cleaning solution and perhaps once or twice a month practice the method described. This will help you become familiar and confident with this medical procedure, while getting the dogs used to it.
How to Administer Subcutaneous Fluids
There are many reasons why a dog may need an owner to give him Subcutaneous Fluids. Diabetes and Renal Failure are two examples.
- The easiest way to Administer Subcutaneous Fluids is to make a ‘tent’ of skin with the thumb and index finger of your less dominant hand and then insert the needle through the skin at the base of the tent.
- This can be done on any area of loose skin. The preferred area would be at the scruff of the neck. The medication lies under the skin and is slowly absorbed over several hours.
- If you are giving a small amount of medication, such as an insulin injection for diabetes, it is best to place your dog in a stand position , then make the ‘tent’, insert needle, then press plunger.
- Also placing a leash or slip lead on the dog will help you gain physical and mental control of the dog. This is important, as we need him to be still. It seems like a frightening proposition, but the needles on an insulin syringe are not very long. Therefore not much can go wrong. The fear would be piercing through the ‘tent’, breaking the subcutaneous contact and that would mean the needle was positioned poorly and it left the subcutaneous area and broke through the skin. You would know this because you would feel a wet spot in the area of the injection. You can also tell that you administered it correctly because the injected fluid will usually appear as a tiny bulge under the skin.
If you are injecting a ‘bag or fluids’ for hydration purposes due to Renal Failure, the procedure can take 10 to 30 minutes depending on the volume of the bag.
- Place a slip lead or leash on the dog to gain control and help limit movement.
- Due to this being a time consuming process, it is best to try and keep your dog in a sitting position.
- You want to keep him calm and comfortable. Perhaps keep him occupied with some treats he can slowly lick and smell and nibble on to pass the time.
- The needles you would be using in his case are much longer than the insulin needles mentioned earlier. Therefore there is a chance that you could pierce through the ‘tent’, breaking subcutaneous contact. You would know this right away because the liquid would be flowing out of the dog’s skin into the air. You can tell you administered it correctly because the dog will have a rather large hump of injected fluid on his back. Like a camel.
- Be firm yet gentle both physically and verbally with your pet during this procedure. We need him to accept treatment yet we do not want to frighten him. You can practice administering subcutaneous medication by purchasing an insulin needle at the pharmacy. Then find a blanket or a towel or some type of fabric that will allow you to make a ‘tent’. Follow the procedure as described above. This will work wonders to increase your confidence. Once you get the hang of it, you will find that administering from an insulin needle is quick and easy. You will realize that it is actually easier to administer this medication to your dog than it is to try and give him a pill!
Preparing Subcutaneous Medication: Insulin or Small Needle Tips
The important tip here is to understand the dosage requirements versus the dosage markings on the syringe before you load it with medication. The Wider the circumference of the syringe or the barrel of the syringe, the larger the dose.
For example you could have a 3 ml syringe or a 1 ml syringe. A 1 ml syringe has literally 100 marking measures on it and is number by 1/10 ml at a mark whereas a 3 ml syringe has 30 marking measures and is numbered by 1/2 ml at a mark.
So, for example, if your prescription is 1 ml a day of subcutaneous fluids and the veterinarian gave you a 1 ml syringe it would be full to the max once you loaded the syringe. If the veterinarian gave you a 3 ml syringe, it would only be one third full with that same dosage. That would be very confusing to a pet owner who was suddenly faced with having to administer subcutaneous medication and has had no practice with it. It is recommended that you ask thee the veterinarian to mark the actual syringe with a sharpie at the point where the medicine should be filled to so that way it is foolproof.
How To Draw Subcutaneous Medication Method &Tips
The syringe for subcutaneous medication has two parts. A plunger to draw the medication and a tube, known as a barrel, to hold the medication. It also has a needle at the tip.
As was stated earlier it could be a long needle for a bag of fluids or something called an insulin needle which is short. These directions are to use with an insulin or short needle.
- Placed the needle tip inside of the medication bottle
- The medication bottle is most likely a vile which has a top made of a rubber substance.
- The needle will be able to easily puncture the rubber topping to enter the vile.
- Place the needle only slightly inside of the vile.
- The needle needs to be submerged in the fluid the entire time.
- Rest the vial in your less dominant hand and the syringe which is now connected to the vial and your other hand.
- Raise the bottle up and at a slight tilt, so it is above the syringe.
- Pull the plunger handle toward your body, so the tube begins to fill with fluid. Most people find that the easiest way to draw the fluid from the bottle into the syringe is to apply the pull pressure with your thumb.
- The tip or bevel of the plunger has two black lines.
- The top line should rest in equal position to the desired amount of fluid. so if you are drawing 1 ml for example the top-line on the bevel should meet the written 1 ml mark on the syringe tube it should meet the Sharpie Mark the vet put on your syringe.